As my schedule frees up (more on that in another post), my love of cooking has been rekindled with the desire to take on projects that take time and to try new things altogether.
For Sunday dinner (Wife and I, you may remember, eat European style on Sunday with our big meal the early afternoon), I made an Austrian Goulash using my now favorite tool, the pressure cooker. I'd only made it once before. I even used a recipe! To go along with it, I had some leftover potatoes and leeks so I was inspired to make a potato and leek kugel. A kugel is like a vegetable pancake but it is put in a dish and baked instead of fried. In my case, I sauteed the leeks first, added the potatoes (both were cut in to thin batons), pressed it all together, and put it in the oven to bake through and crisp up.
Of course, I neglected to take a single picture 😩
But you will forgive. For I am to provide you with a full instructional on the making of Harissa WITH PICTURES.
I am not sure when I made my first Harissa (Harissa is a North African chile pastes). I am sure it was at a time when I was wondering what to do with a mass of dried red chiles from the garden. However, I immediately fell in love with it. I use it as a spread on sandwiches, as a flavoring for eggs, a flavor boost for all kinds of things I cook, etc. Loving it so much, but recognizing it was a pain to make, I looked to purchase it at local Middle Eastern grocery stores. However, the versions I bought tasted nothing like the version I made. I would make it from time-to-time. But, as my schedule got busier, it became too big a chore.
A month or so ago, as I was purging my pantry, I was reminded of the bags of dried chile I have had from prior harvests waiting for me. This weekend with time to spare it was time to get to it.
At first blush, making Harissa sounds fairly simple. One takes off the stems and removes the seeds from the chiles. Then soak them in boiling water for an hour to an hour and a half. Now remove the chile pulp from the skins - this is where things get interesting. Create the flavor base for the Harissa by mashing garlic with salt, sauteing it in olive oil, adding toasted coriander and cumin seed that has been ground to a powder, add the chile pulp, cooking for five minutes to meld flavors, and voila, Harissa.
Seeding the Chiles

I soaked (no pictures) and then began the process of removing pulp from skin
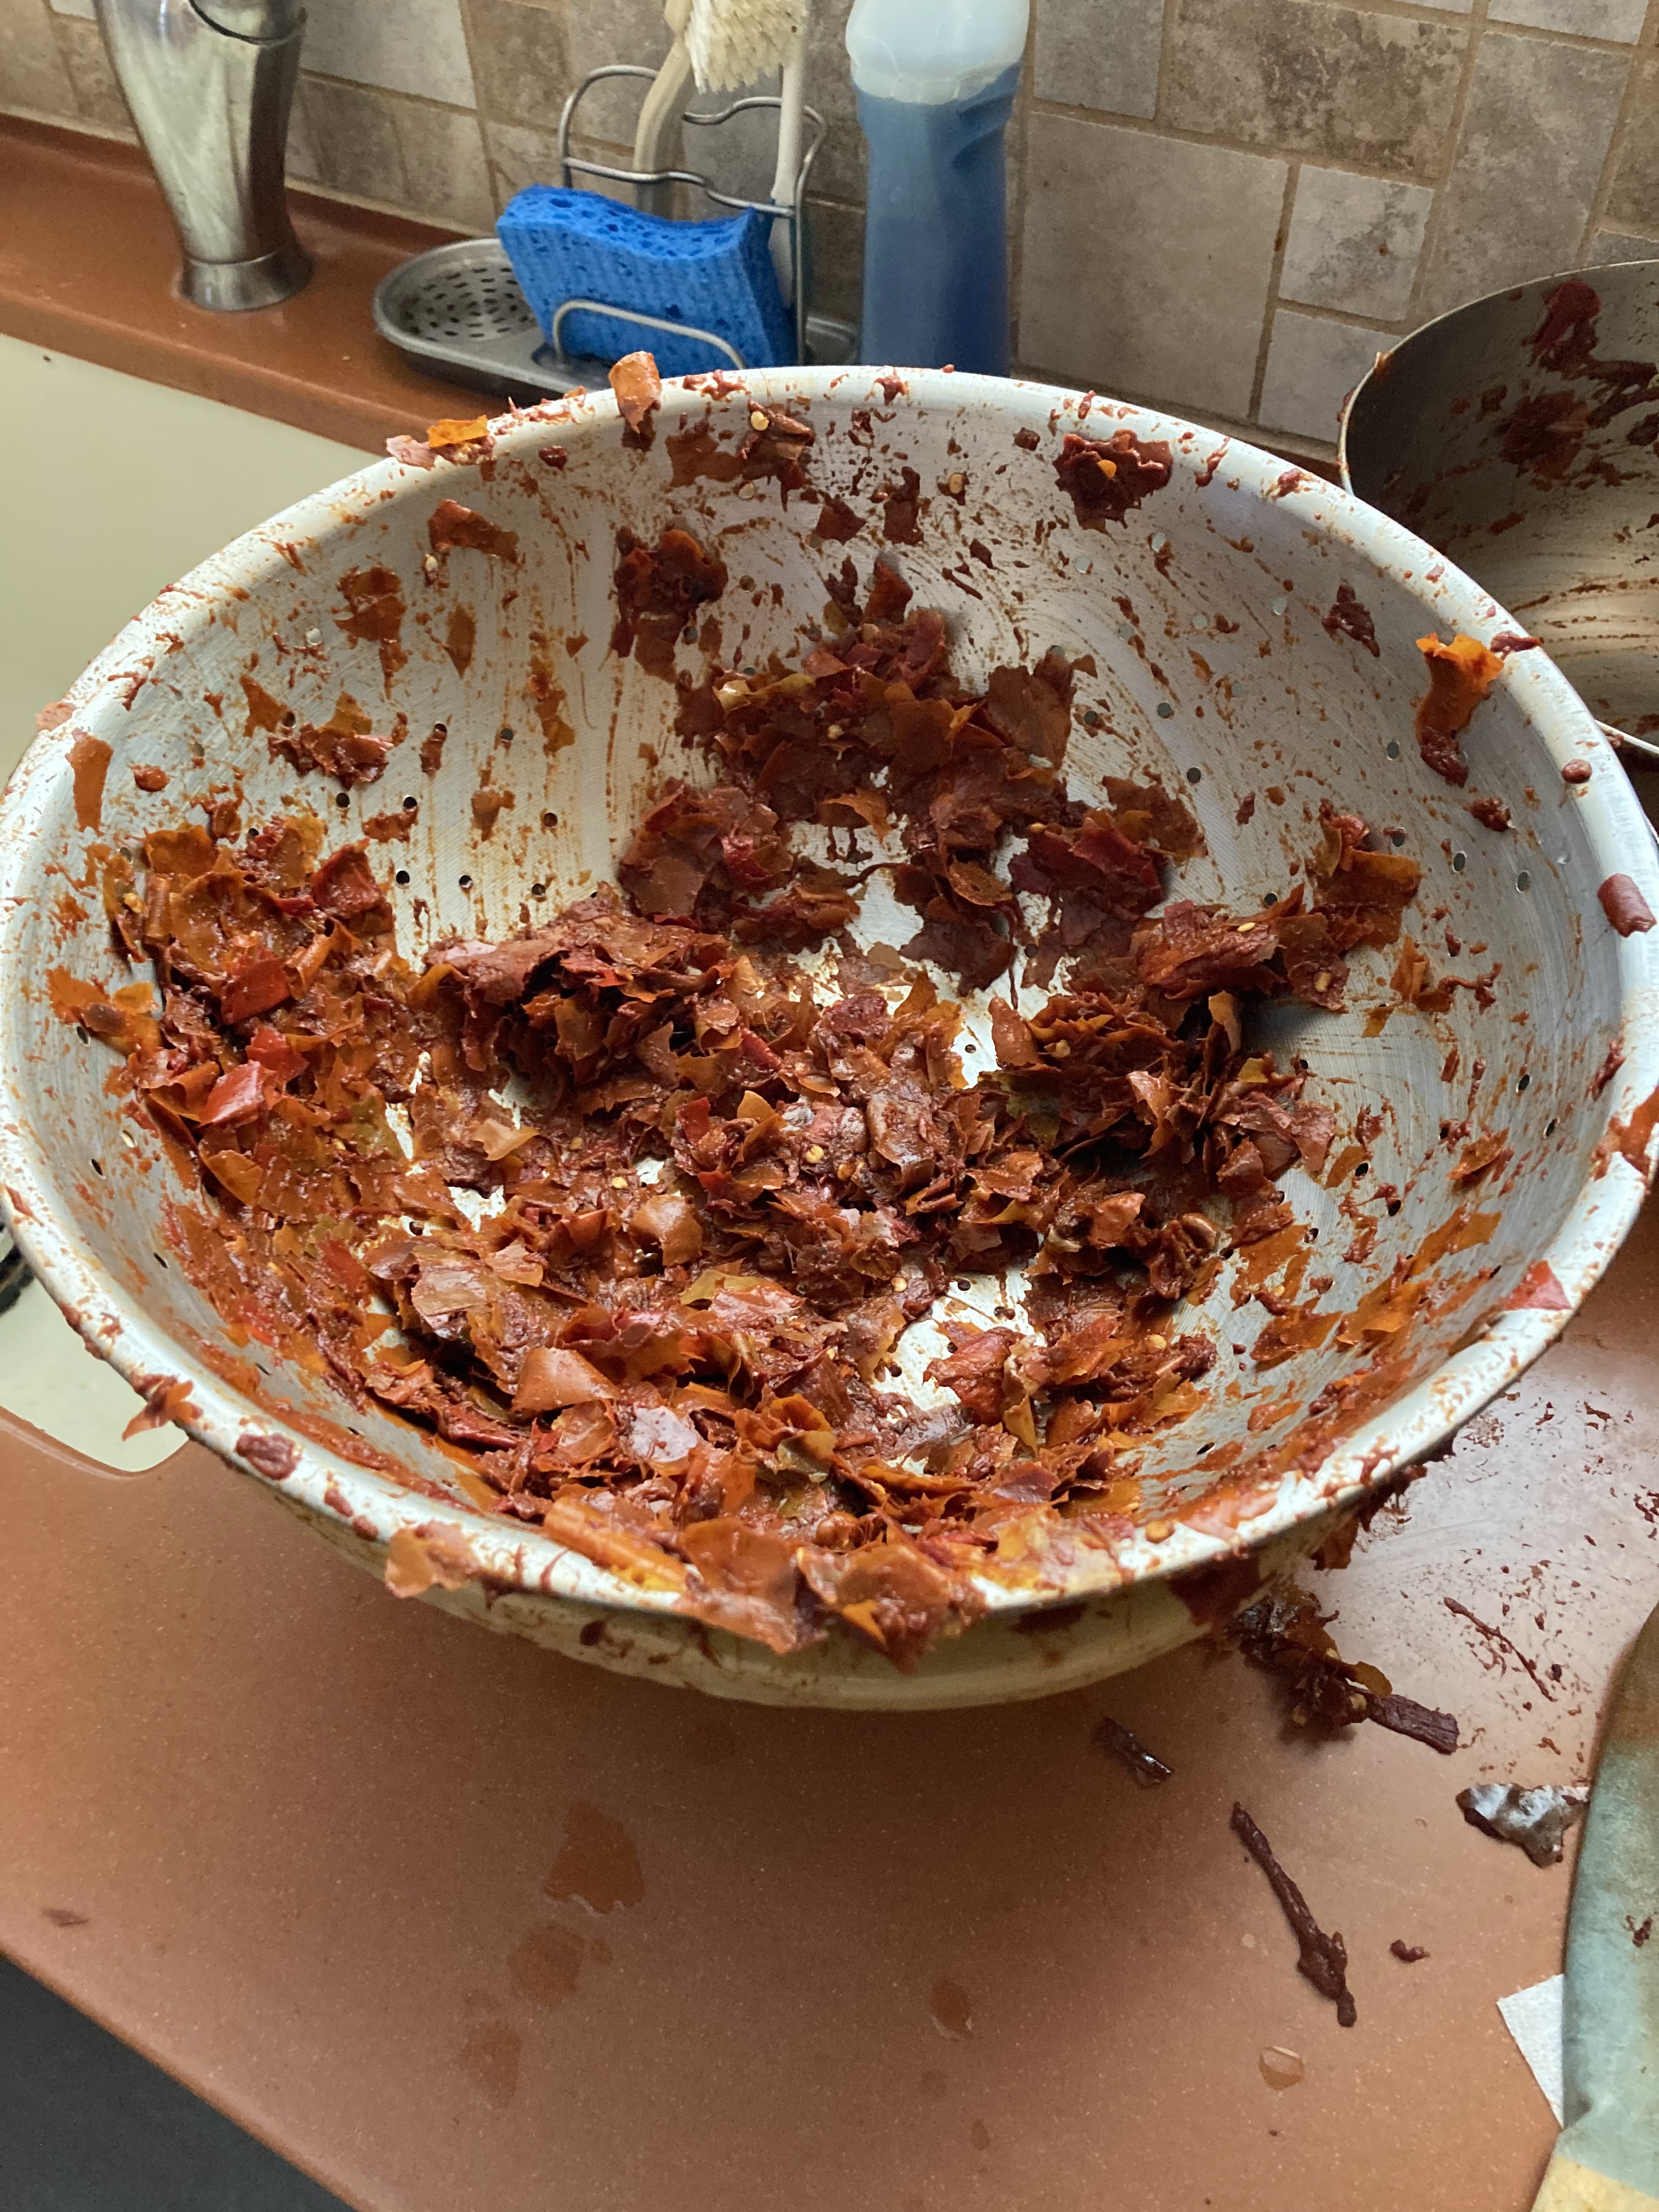
If this picture reminds you of some horror movie slaughter scene, trust me, this was the aftermath once I had cleaned up a bunch.
I started by getting rubber gloves (these are chiles right) and trying to mash the softened chile pods through the colander. But they weren't broken down enough. So I moved them back to a bowl, got a chopping implement and proceeded to whack away at them (chile going all over the place). Then I got a potato masher and whacked away further at them. Finally it was back to using the heel of my hands to mash them through the colander. The reason there are no pictures is that my gloved hands were covered completely with chile!
But finally, here we are, pristine, virgin chile pulp

Ground coriander and cumin seeds

Sauteing the mashed garlic then adding the ground spices


Add chile pulp and cook

Put into storage containers for freezing

Simple. N'est-ce pas?
2 comments:
So much work! But it's not complicated, and much good food is a lot of work.
what pleasure to get oneself lost in this sort activity! I'm sure it tasted really delicious
Post a Comment